Wednesday, September 4, 2013

Perfect Deviled Eggs

Deviled Eggs: Simple tricks for perfect results So I did some online research and found these great ideas.

First step: Plan ahead. Make sure the eggs you’re going to boil aren’t particularly fresh – the fresher the egg, the more difficult it is to peel after it’s boiled. And how do you identify the less-fresh eggs you want? Look at the date on the side of the carton; if you’re buying eggs for devilin
g, go for the carton with the closest sell-by date.

Second step: Take your carton of eggs, and prop it up on its side in the fridge for at least 12 hours (preferably longer) before starting your deviled eggs project. You’ll want to put a rubber band around the closed carton.
Third step: Bring eggs to room temperature before you’re ready to cook them; cooking times are based on room-temperature eggs, not cold ones. If you forgot to take the eggs out of the fridge, place them in a bowl of hot tap water for 10 minutes, to take their chill off.

OK, NOW we’re ready. Let’s boil some eggs. Place the eggs in a single layer in your chosen pot, one with a tight-fitting cover. Add water to the pan until the eggs are covered by about 1″. Bring the eggs to a rolling boil. Not a simmer, not a hard simmer, but a real, full-out boil.

IMMEDIATELY remove the pan from the heat, and slap on its cover. See, you’re not really HARD-boiling the eggs; they’re going to SLOWLY cook in hot water. Start your timer: 12 minutes for medium eggs; 17 minutes for large; 19 minutes for extra-large, and 20 minutes for jumbo.

Why is the timing so important here? I mean, hard-boiled is hard-boiled, right? Not to deviled egg aficionados. Over-cooking eggs results in rubbery whites; and adds the dreaded “green sheen” to their yolks. For tender whites and bright yellow (not greenish) yolks, cook for the recommended amount of time. When the timer goes off, drain the eggs and place them in a bowl of ice water to cool. Once they’re cool, peel and make deviled eggs; or refrigerate for up to 1 week.

When you’re ready to peel the eggs, tap the flat end on a hard surface to crack it; then start peeling. Peeling under cold running water makes the task easier. OK, so why did you prop your egg carton on its side for 24 hours? To center the yolks in the whites. Top egg, not propped; bottom egg, propped. “Oh, big deal,” you say? Hey, if you’re going for the prettiest plate at the potluck, presentation matters! See these? No green. Lesson learned.


These amounts are for 6 boiled eggs, which will yield a dozen deviled egg halves.

Add the following to the cooked yolks:
1/4 cup mayonnaise
1 to 2 teaspoons prepared mustard; or 1/4 to 1/2 teaspoon dry mustard
1/4 teaspoon salt 2 to 4 tablespoons sweet pickle relish, pressed dry;
optional 1/2 teaspoon Worcestershire sauce, optional, for enhanced flavor
Stir gently to combine.
Pack the yolks back into the whites; a teaspoon cookie scoop is a handy tool for this task.
If you’re feeling fancy, you can pipe the yolks using a pastry bag and tip; personally, I’ve never felt that Martha Stewart-ish…
The traditional garnish is a light sprinkle of paprika atop the yolks; this gives the deviled eggs some color, but is completely optional, of course.

Now, how about some simple variations?
•Curried deviled eggs: Substitute 1/2 to 1 teaspoon curry powder for the mustard; and 2 to 4 tablespoons finely chopped chutney for the pickle relish. Omit the Worcestershire sauce.
•Scallion deviled eggs: Substitute 2 to 4 tablespoons finely chopped scallion, both white and green parts, for the pickle relish. Add 1/4 teaspoon onion powder, if desired.
•Savory deviled eggs: Substitute tartar sauce for the mayonnaise and omit the pickle relish, for a slightly less sweet/more tangy treat.

Keep these simple tips in mind as you embark on (or continue) your deviled egg journey. With all those boiled eggs you end up with around Easter time, it’s good to have a destination beyond egg salad!

Tuesday, June 25, 2013

Pitch a Tent

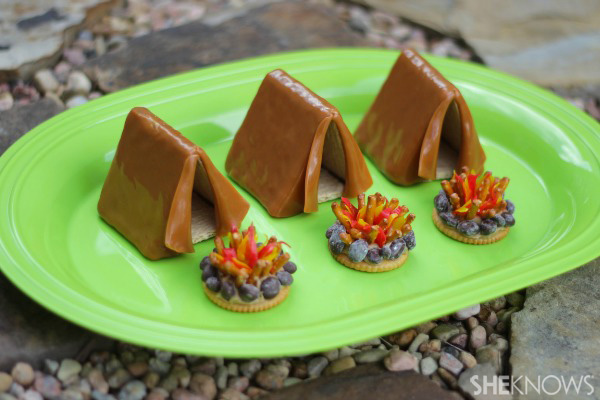
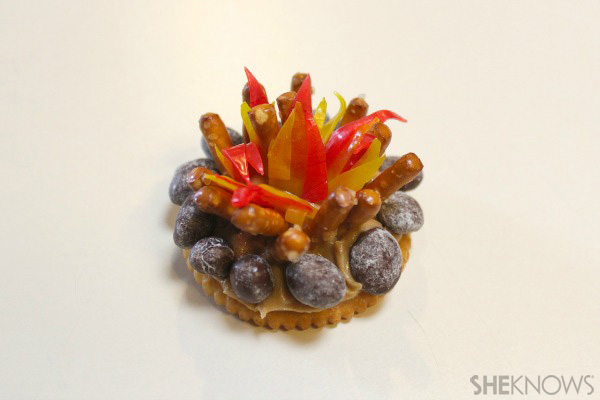
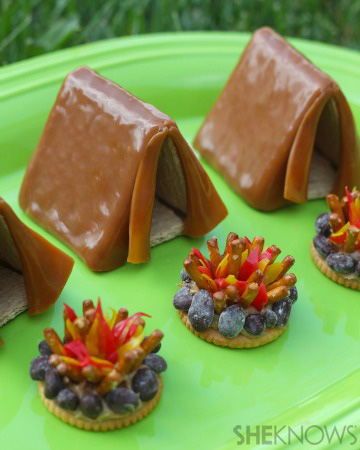
After our camping trip this weekend I was thinking of all the stuff that went well, and all of the things that could have went smoother. I should have brought things to make crafts with the kids like I had originally thought to. I found this cute tent cookie and campfire cracker recipe online. How clever are they!?
 
Tent and campfire treats
Celebrate the great outdoors with these summery treats!

Tent cookies recipe

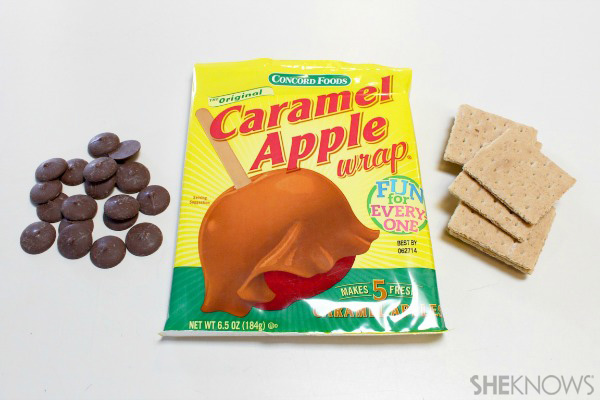
Ingredients for the Tents:

  • Chocolate candy melts (1/2 cup or less)
  • Graham crackers
  • Caramel apple wraps
Tent and campfire treats

Directions:

1

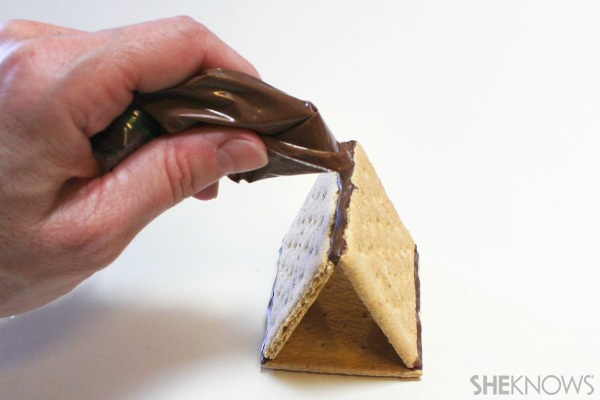
Form tent from graham crackers

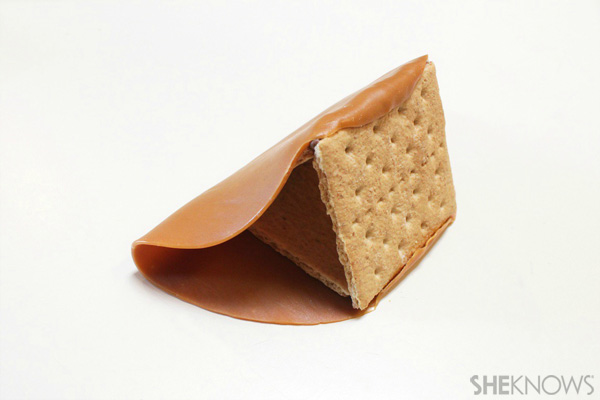
Melt chocolate candy melts in a microwave safe dish. Pour into a pastry bag (or use a zip-closed bag with the end snipped off). Pipe the edges of three graham cracker squares with the candy melt and join to form an A-frame tent.
Tent and campfire treats
2

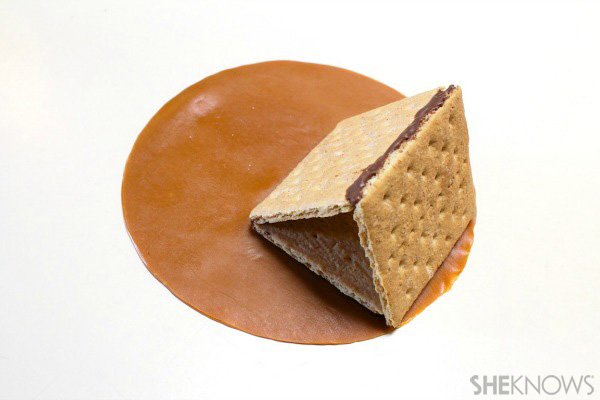
Wrap tent in caramel

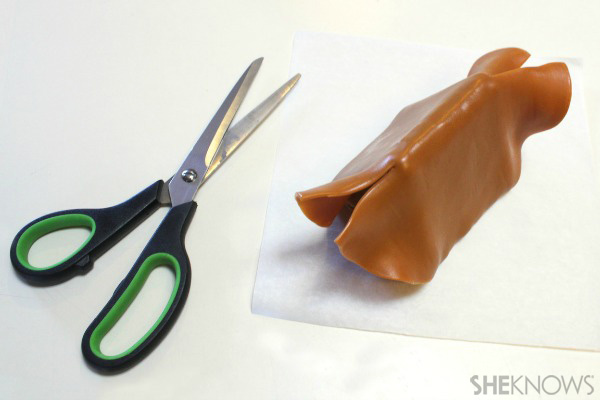
Allow them to dry and harden. Place one side of the graham cracker tent on a caramel wrap. Fold the caramel over the graham cracker tent, until it reaches the bottom edge of the other side.
Tent and campfire treats
3

Seal tent back and create opening

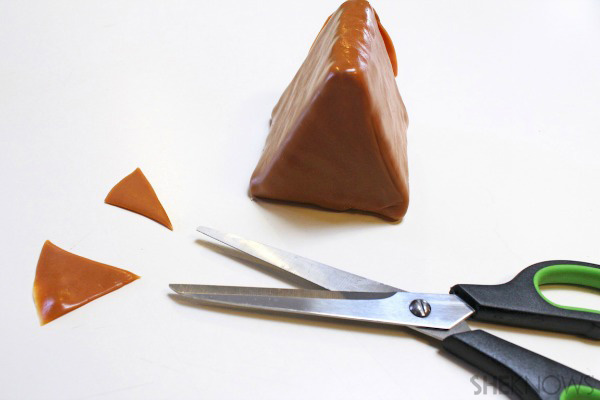
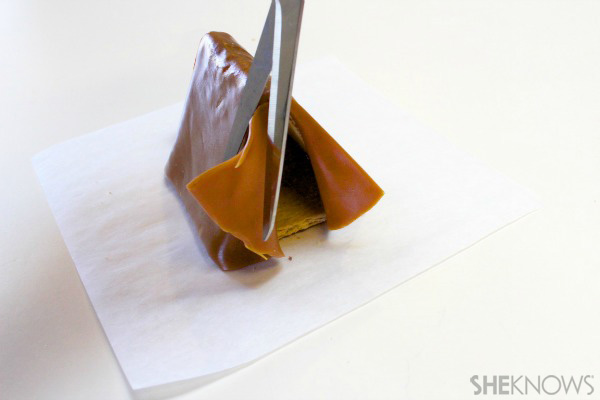
Cut the front and back flaps of caramel. Wrap the back flaps to seal shut. Cut the front pieces to make the flap openings of the tent.
Tent and campfire treats

Campfire treats recipe

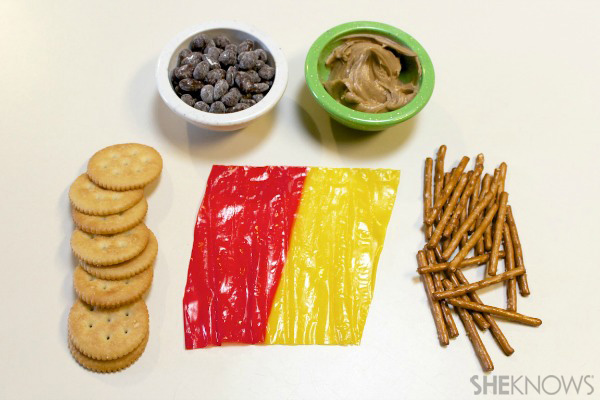
Ingredients for the Campfires:

  • Ritz crackers
  • Pretzel sticks
  • Chocolate-covered raisins
  • Powdered sugar
  • Peanut butter
  • Red/Yellow Fruit Roll-Ups
Tent and campfire treats

Directions:

1

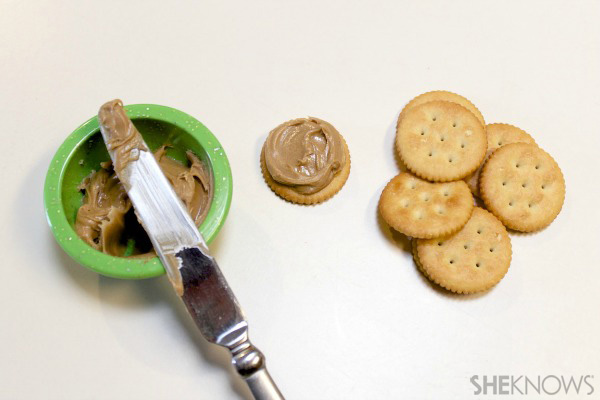
Prepare the crackers

Spread peanut butter on the crackers.
Tent and campfire treats
2

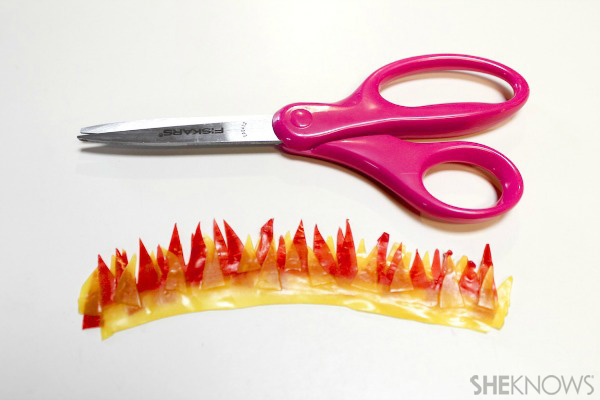
Create the "flames"

Cut strips of red and yellow Fruit Roll-Ups into jagged, triangle/flame-like edges. Layer the red strips over the yellow strips and cut into 1-inch segments.
Tent and campfire treats
3

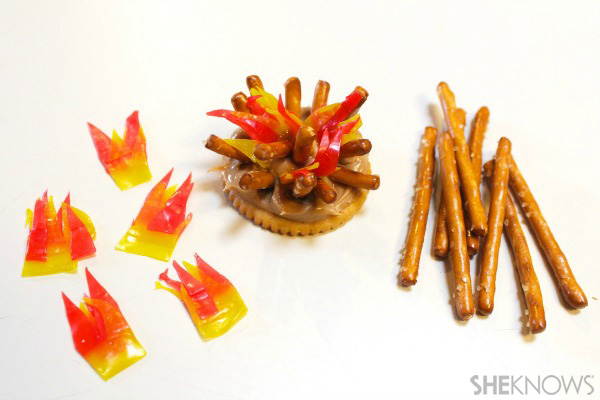
Attach the "logs" and "flames" to crackers

Insert tiny pieces of pretzels and the Fruit Roll-Up fires into the peanut butter centers.
Tent and campfire treats
4

Add the finishing touch

Dust chocolate-covered raisins with powdered sugar. Attach chocolate-covered raisin "rocks" around the outside edge of the crackers.
Tent and campfire treats
5

Create your campsite

Present your adorable tent cookies and campfire treats together!
Tent and campfire treats

Tuesday, April 9, 2013

Weekend Warrior

As many of you know, I think food is addicted to me. It's okay though, cause I love him right back. I always say, "I want something delicious", when I speak of food. Not all of the time can we afford to splurge and go out. But that doesn't mean we have to suffer at home. And since I was quarantined to my house (due to strep throat), I just had to cook up a storm. P.S. I was no longer contagious or else I wouldn't be touching other people's food. Germs are gross!

Saturday I wanted something refreshing and light. Okay, so I was naughty and went to the market to buy my goodies. We had shrimp and lemons already so we just needed the bell peppers, red onions, avocado, cilantro, etc. Normally I use limes but I wasn't going to fork out more cash than necessary. When making ceviche I find that it is best to buy the mini bell peppers instead of the whole bell peppers. One, they're cheaper, and two, I don't always use the whole bell pepper and it will go to waste. Hey, I was making ceviche on a budget.

I found some really nice steaks on sale so we divided them up and made two separate marinades. One was a tame soy and brown sugar for the kiddies, and we decided to kick it up a notch Emeril style for the adults. I used smoked paprika, red pepper flakes, Worcestershire, onion powder, freshly crushed garlic, a dash of cumin, freshly ground black pepper, and Lawry's meat tenderizer. It came out really nice.

My daughter helped me mix and taste the ceviche while the steaks were marinating. Oh to be seven again. I also got my Food & Wine magazine that day in the mail. On the cover Nina and I saw a simple tomato and bell pepper salsa. You can find the recipe here: fresh-tomato-and-pepper-salsa We figured since we had the ingredients, might as well! I roasted some corn to go along with dinner and threw a little bit in the salsa to blend everything together.

These were our finished products:


Sunday I knew I had to get out of the house. I was stir crazy already after one day. Out of the house for me normally entails visiting familia. This time my mama was the lucky victim. I called to make sure she was going to be home and told her I was bringing dinner. On our trip to the market Saturday we found some inexpensive marinated chicken thighs. I normally like to use chicken breast but this time decided to branch out and try something different. It really worked out well because my enchiladas came out moist and delicious! 

Monday, April 8, 2013

Welcome!

Hello and welcome to my blog. I have been wanting to do something like this for a while. It will be mostly potpourri with some recipes that I'm willing to divulge, and pictures of food I have made. Basically things that I find interesting.

The Title of this Blog came to me after much thinking. The Larkspur And The Mum are the birth flowers of my two children.

Nina is my Larkspur.


And Joshua is my Chrysanthemum "Mum".


I look forward to this new adventure and will try to keep this fresh and lively. Thanks friends and familia.


dani